Check the available route before opening the camera
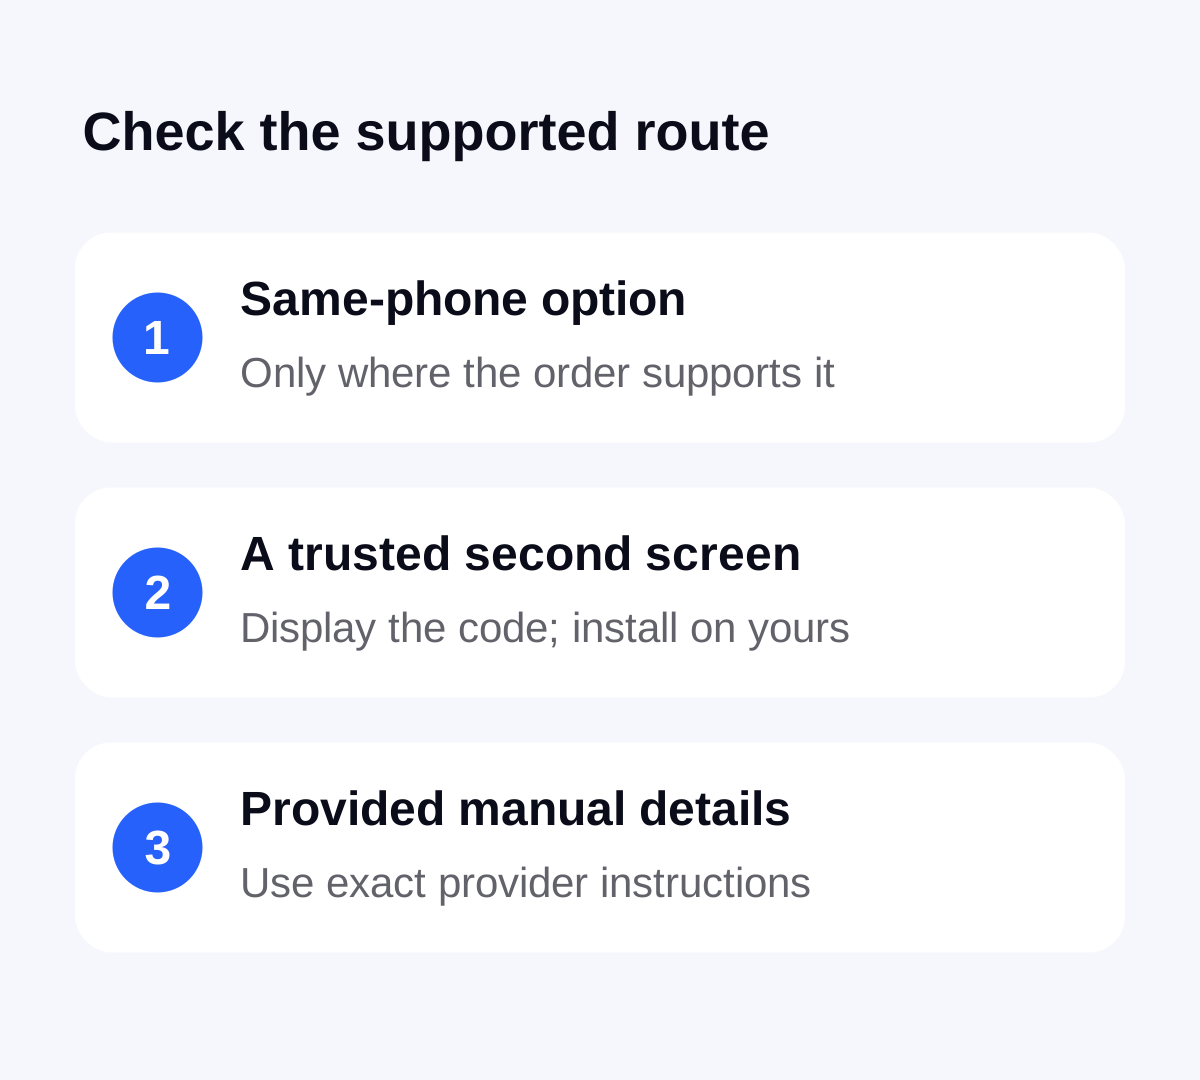
A camera pointed away from the phone cannot photograph the image being displayed on that same screen. The useful question is which other setup method the provider and phone support. Check the order instructions for an installation action, a QR route or manual details.
Keep the phone you intend to use clearly identified. If a companion lends a screen, it is a display for the instructions; it is not automatically the device that should receive the eSIM. Our guide to changing phones explains why buying an order and moving an installed profile are different questions.
On a supported iPhone, check the same-phone option
Apple documents that on iOS 17.4 or later, a carrier QR code received in a default email app or browser can be pressed and held, then added with Add eSIM. Follow the subsequent prompts. This is a documented route for that context, not a promise that every image in every app will expose the option.
Apple also lists carrier links, carrier apps and manual entry among possible setup methods. Which one is available depends on carrier support. Use a route actually supplied for the order, rather than assuming a button described for another service exists in Stellar.
If the expected option is absent, note the software version and where the code is displayed. Avoid treating a missing menu item as proof that the purchase is broken. Move to another supported route or ask support to confirm the right one.
Use another screen if that is the provided QR method
Open the order’s code on a trusted computer, tablet or companion’s device, then follow the installation instructions on the travelling phone. Keep the full code visible and the display readable. Check the order reference privately so you are using the right traveller’s installation details.
Do not post the QR image in a group chat or upload it to a public image host just to make it easier to scan. If you borrow a device, avoid leaving an account signed in or an activation image where another person could access it. A private display solves the screen problem without turning the installation details into shared content.
Use manual details only when the provider supplies them
Apple’s manual route is in Settings, Cellular or Mobile Data, Add Cellular Plan, then Enter Details Manually. Use the exact information supplied by the provider. Do not guess addresses or codes from an example found online.
On Pixel, Google describes adding an eSIM from Network & internet and SIMs, then following the provider setup flow. Android labels and available alternatives vary. Check the phone manufacturer and the order instructions before assuming an iPhone manual-entry screen has an Android equivalent.
If the order offers no suitable alternative, ask support for a supported method for the exact phone. Describe whether you have only one screen, what setup step you reached and whether a profile already appears in mobile settings. Keep passwords and activation details out of public posts.
Before retrying, check what already happened
Look for the travel profile in mobile settings and read any error message. Do not buy another plan simply because a QR image remains visible in the email. The screen containing the code is not a reliable installation status indicator.
Apple advises against erasing an eSIM as a troubleshooting step unless the carrier directs it. Repeated deletion and scanning can create an additional recovery problem. If service fails after installation, use the connection troubleshooting guide to separate installation, line selection and coverage.
Finish setup at the right time
Arrange a reliable connection for setup; Apple normally requires Wi-Fi or a hotspot, with exceptions for some models and regions. Read the activation timing checklist before testing a line that could begin its validity on connection.
Choose and buy the plan in Stellar eSIM, follow the order-specific installation instructions and use the app to follow the remaining allowance. The iPhone setup guide and Android setup guide cover the next device steps. Keep the code private after setup and retain the order reference for support.
Sources & further reading
Product information and device guidance used for this article. Check your selected plan and exact device before purchase or setup.